Ever wished you could sort your Salesforce list views by more than one column?
If yes, in the Winter ’26 release, Salesforce finally lets you do exactly that.
With multi-column sorting, we can organize our records across several fields in a single view so that we can spot trends, prioritize work, and get insights faster without juggling multiple tabs or reports.
In this guide, we’ll walk you through enabling multi-column sorting and then applying it in your list views, step by step.
Here’s a simple, step-by-step guide to getting it set up and making the most of it. Take a look!
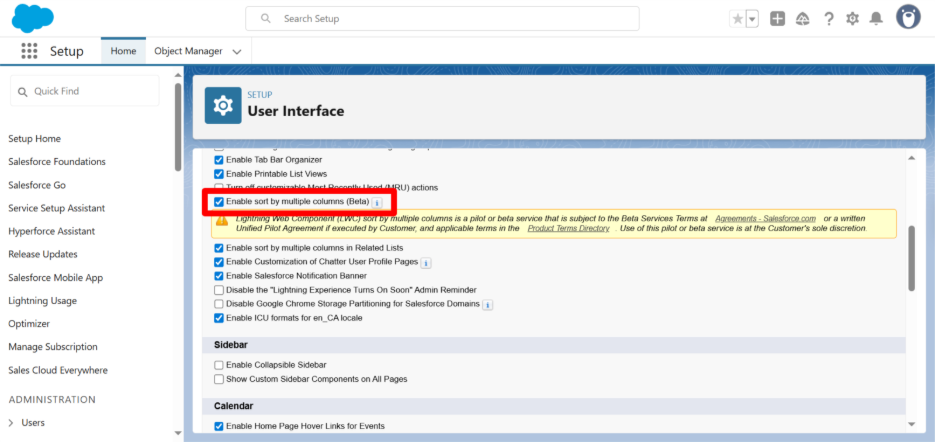
Step 1: Navigate to Setup and Enable Multi-Column Sorting
First things first, before using multi-column sorting, we will have to make sure it’s enabled in your org: So, to enable multi-column sorting
- Go to Setup in Salesforce.
- In the Quick Find box, search for User Interface.
- Check the box for Enable Sort by Multiple Columns.
Once enabled, your org is ready for multi-column sorting in any list view. This is one of the handy features introduced in the Winter ’26 release updates to improve productivity in Lightning Experience.
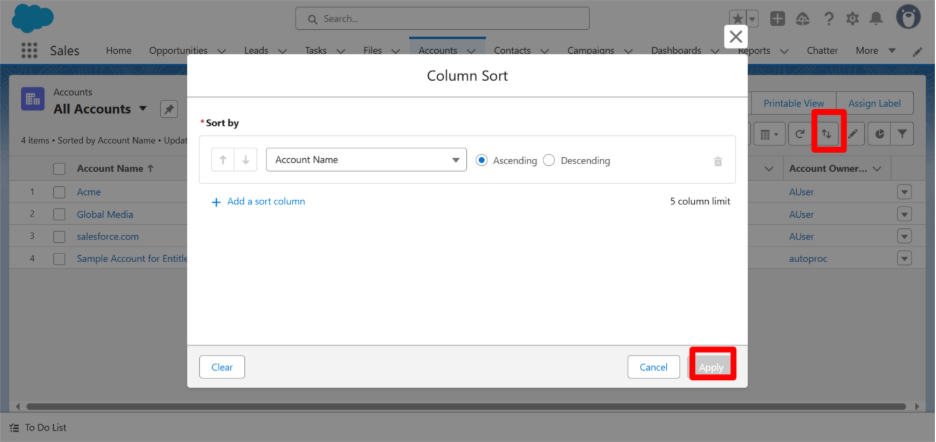
Step 2: Apply Multi-Column Sorting
After you have enabled and saved the setting, move to setup, type Sales, and go straightaway to Accounts, where you can sort your list views across multiple columns:
- Open a list view, like Accounts or Opportunities.
- Click the Sort by Multiple Columns icon (two arrows, one up and one down, in the top-right corner).
- Add your first column:
- Click + Add Sort Column.
- Choose the field and set it to Ascending or Descending.
- Add more columns:
- Click + Add Sort Column again for each additional field (up to five).
- Set the sort order for each.
- Click Apply to see your updated view.
Pro Tip: The order in which you add columns determines the sorting priority.
Multi-Column Sorting Uses
This feature is especially handy when reviewing Opportunities, Support Cases, or Accounts. For example:
- Sort Opportunitiesby Stage → Close Date → Amount to see which deals are closing soonest and which are largest.
- Sort Casesby Priority → Created Date → Owner to tackle the most urgent tickets first.
It’s a small change that makes your list views way more meaningful and actionable.
Conclusion
By following these steps, your list views will now display records in a more meaningful order, helping you act faster and focus on what matters. Features like this, introduced in the Winter ’26 release updates, are small tweaks that make a big difference for Salesforce users.
Thinking of tailoring this for your org or packaging it into something bigger?
Our Salesforce development experts can help you get there. Let’s make it happen; connect with Synexc today!!